Getting Started with Inkmate Chat
Welcome to Inkmate.ai, an all-in-one AI tool suite designed to simplify and enhance your content creation experience. In this tutorial, we will guide you through the process of setting up and using the Inkmate Chat module powered by ChatGPT, a state-of-the-art AI chatbot. This tutorial is designed for beginning AI enthusiasts and content creators who are looking to engage with an AI chatbot to gain insights, ask questions, or explore new ideas.
Step 1: Login to Inkmate.ai
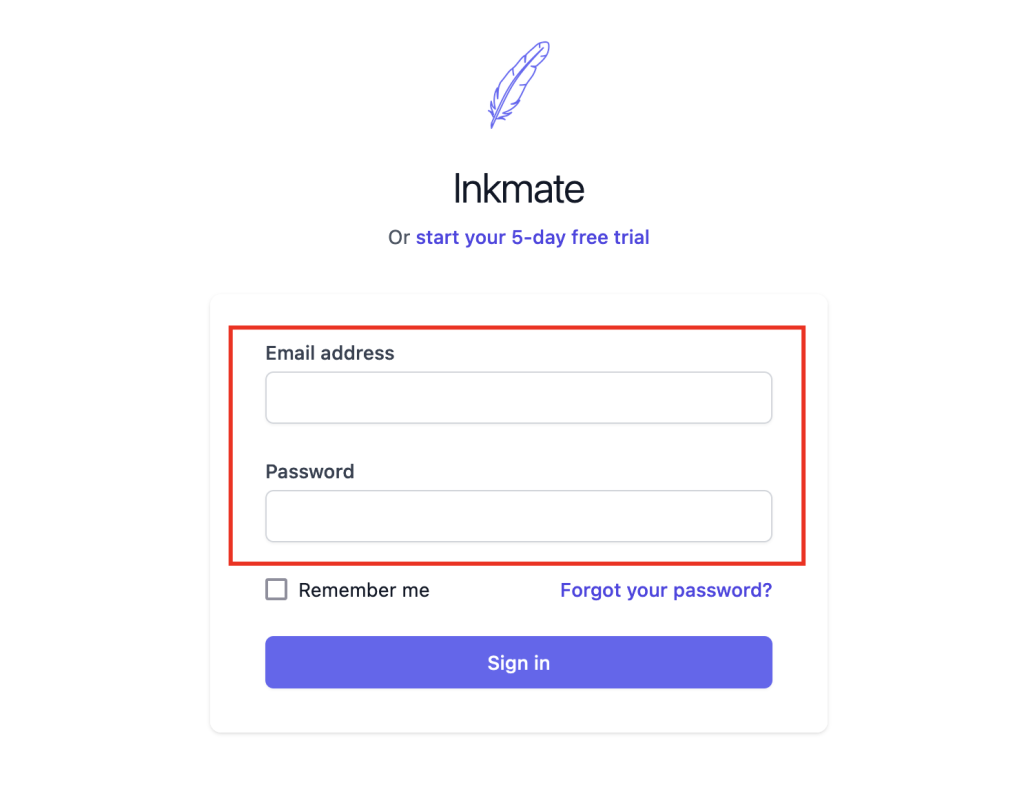
To begin, log in to Inkmate.ai/signin using your email and password. If you haven’t registered yet, sign up for a new account.
Step 2: Access the Inkmate Chat module
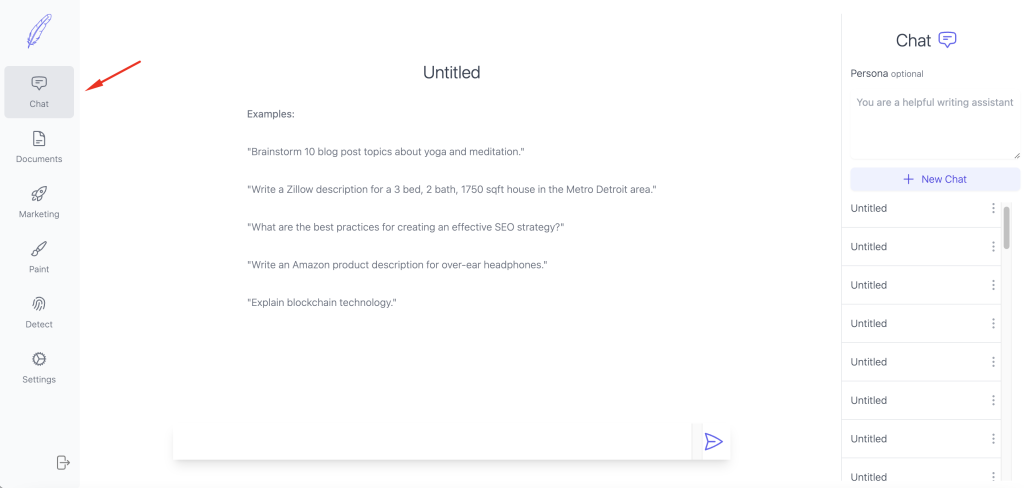
Once you’ve logged in, you’ll be directed to the Inkmate Chat module. Alternatively, you can click the “Chat” button located at the top left corner of the screen (see arrow), to navigate to the chat module.
Step 3: Set a persona (optional)
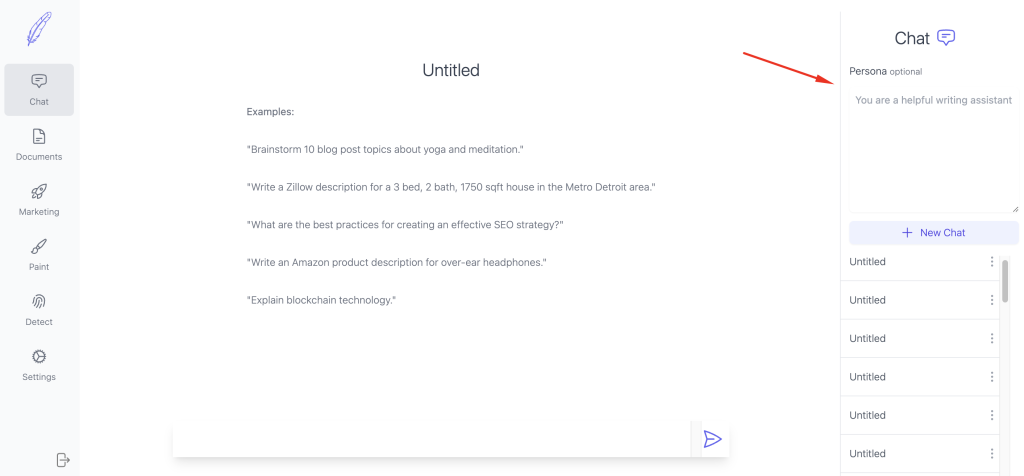
Inkmate Chat allows you to set a persona for the AI chatbot, enabling it to act as an expert in a specific field or exhibit certain characteristics. To set a persona, input a persona or a role that you define for the AI.
Here are some examples for personas:
Tech Support Agent: A helpful and knowledgeable expert in troubleshooting software and hardware issues, providing clear instructions and assistance to users experiencing technical difficulties.
Fitness Coach: A motivating and experienced personal trainer who provides workout routines, nutrition advice, and guidance on achieving fitness goals while promoting a healthy lifestyle.
Travel Advisor: A well-traveled and informative guide who offers recommendations on destinations, accommodations, activities, and local customs, helping users plan memorable trips.
You can also skip this step if you prefer a more general AI interaction.
Step 4: Start a Chat Session
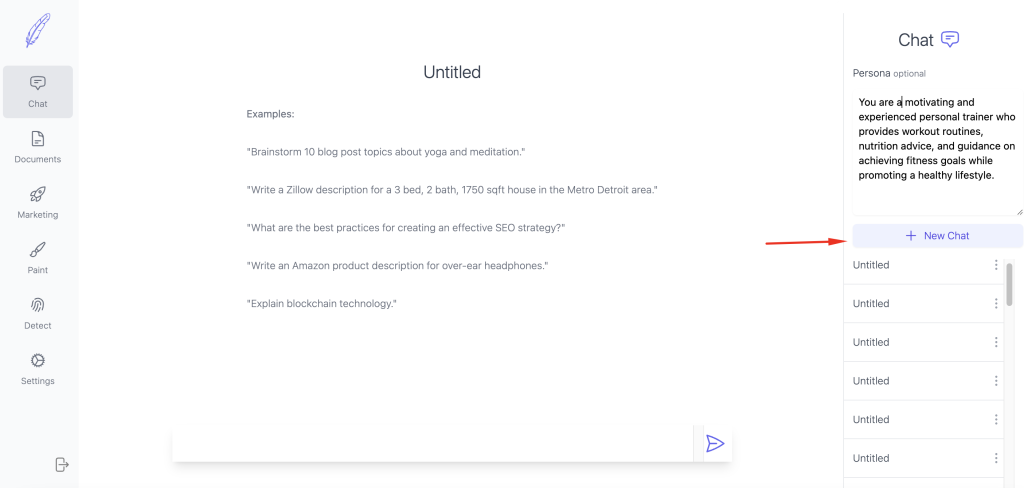
After setting a persona, click the “New Chat” button at the upper right (see arrow), to begin a new start session.
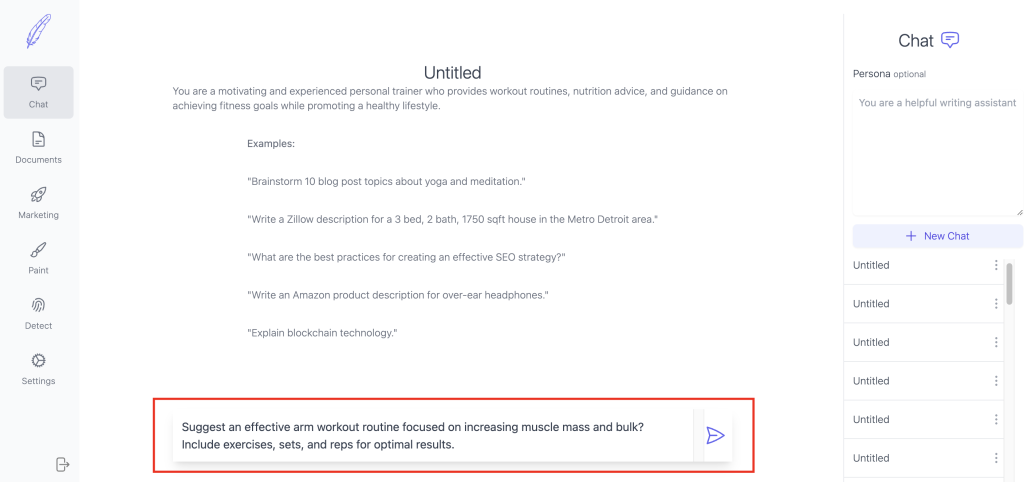
At the bottom of the screen, you’ll find an input bar. Type your questions or prompts, then press ENTER, or click the “Send” icon at the right. You can now start to engage with the AI chatbot.
Step 5: Receive AI-generated responses
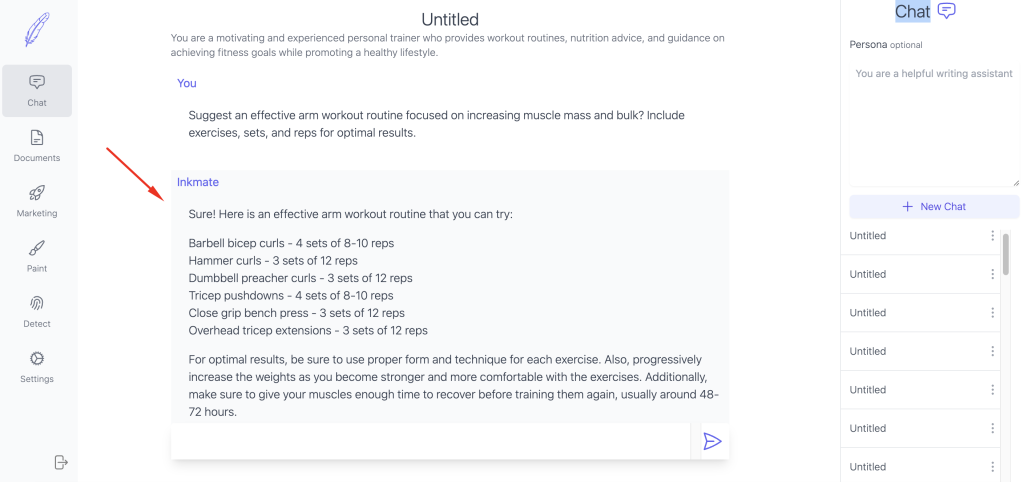
After you’ve entered your question or prompt, the AI will generate a response immediately. This output will appear on your screen, allowing you to review and analyze the information provided.
Step 6: Engage in an interactive conversation
Feel free to ask follow-up questions or provide additional comments. The AI chatbot is designed to engage with you in a dynamic and interactive manner.
Step 7: Save and access chat sessions
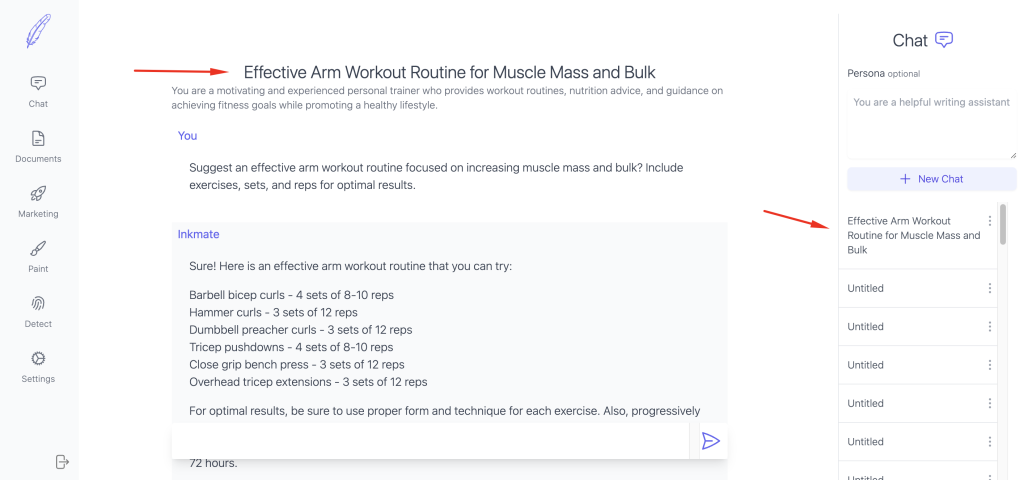
Each chat session will be automatically named and saved, allowing you to access it at any time. To review a previous chat session, simply select it from the list of saved sessions.
Step 8: Delete chat sessions (optional)

If you wish to delete a specific chat session, click the 3 vertical dots to the right of the file name you wish to delete, then click the “Delete Chat” button that appears. this will remove the file from your saved sessions.
Conclusion
By following this tutorial, you are now equipped to engage with the Inkmate Chat module powered by ChatGPT. Enjoy exploring new ideas, asking questions, and gaining insights from this powerful AI tool. Remember that Inkmate.ai offers many more modules and features, so be sure to explore the full suite of AI tools available to you.
Don’t miss out on the opportunity to harness the power of Inkmate.ai and take your content to the next level! Try Inkmate.ai FREE.
.